Showing posts with label crafts. Show all posts

10/10/12

Connecting + Pinterest


Funny story about blogging. You can't wait to start a blog and want to blog everyday then you want a break. During said break you discover all the other ways to socially connect with people. Such an increase from the days when you started blogging here back in 2006 that it could be overwhelming if you tried to connect using all of them. I actually began blogging earlier than 2006,  but back then I started a blog on live journal, around 2000-2001.  So much has changed.

Emailing friends and family used to be the main way to "connect" then came Facebook. I thought about it recently and the only times I email now are for work related or school/volunteer related topics. Interestingly enough, junk mail always finds a way in. Ha. I never did tweet but I finally flickr'd, then came pinning, and I'm eyeing Instagram as a possibility next.

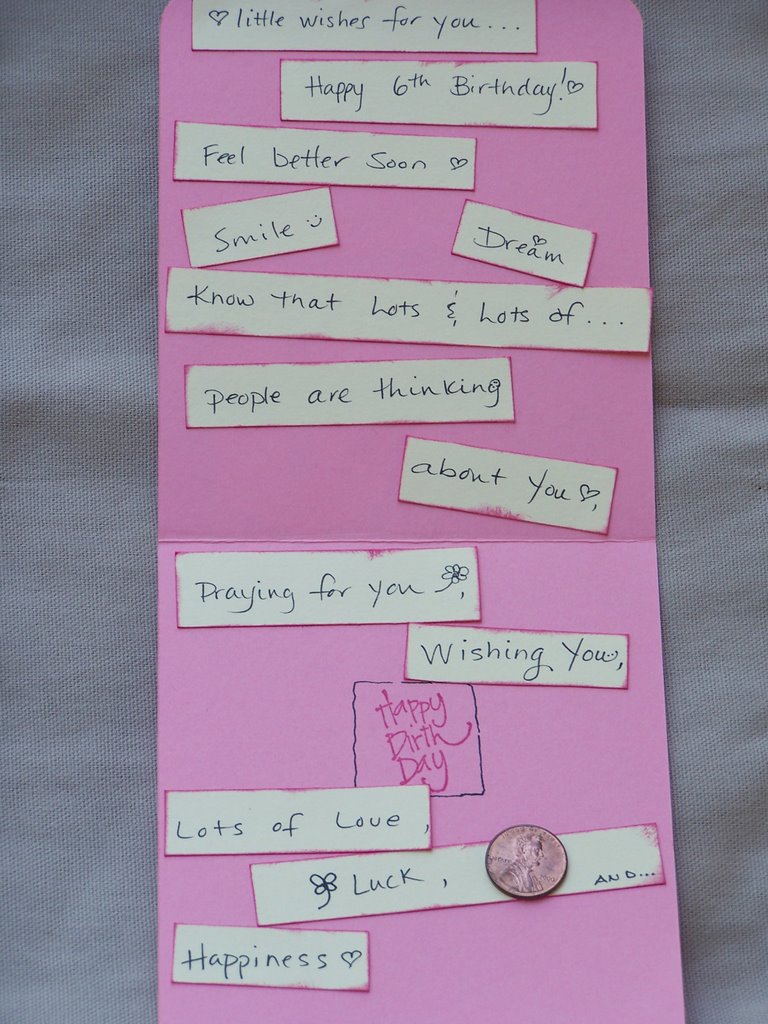
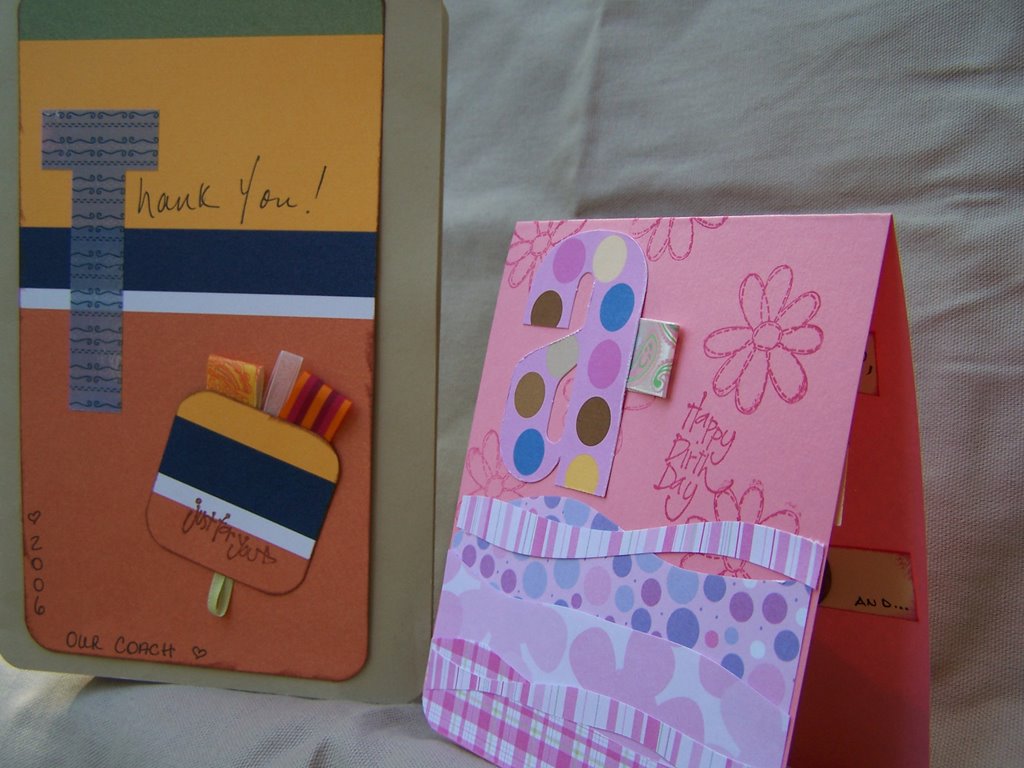
Well, I guess so much hasn't changed. We still like to connect and share we just go about it differently, at blazing speeds it seems. The funny thing is that while I was on Pinterest one night about a month ago I saw one of my older card pictures on someone's board {the photo above}. I did a double take. I hopped off the couch, OMG! But since no one was around to share this nerdy moment with, because it was about one o'clock in the morning, I sat back down.  I just had to see for myself, and yes there it was. I was flattered yet perplexed at how such an old post, from '08, could have made its way to a crowded place like Pinterest. Go figure.  Where was i going with this?  Oh yea, and funny story, that's how I made my way back to this blog.


Through the stats on the blog I discovered that the post from this one sizzix papercraft experiment is the most popular on my blog. It was also listed on a craft site much later. I never checked those stats that much, so when I found out in 2010, it was a pleasant surprise. :) I also enjoyed reading the many comments about it, some from '09, '10 and '11. Thanks!

I have also moved up to the LifeStyle Crafts letterpress machine, good results, not crazy about the plastic plates, felt they could have done a better job on that. I barely use my original sizzix now. But just last week my daughter, who is in 7th grade now (she was only 6 when I started this blog!) wanted to use some die cut letters for a social studies project so we hauled out the old reliable machine.

I love the look of embossed paper still. Recently discovered so many nice embossing folders from stampin'up and darice, they have been my first purchases for crafts in a long time. See, around the same time I took breaks from blogging I also took breaks from buying too many craft/scrap booking supplies. It felt good not to overload, or just even not to think about or obsess over whether I had the latest and trendiest stuff. Goodbye to over buying, and now I only buy what I need, really really love and can get much use out of.

Cheers to connecting!

9/22/11

handmade gifts for teacher

Note: I found this post "in draft" from two years ago. I don't know why? - probably had to check the links and then forgot ??  

I haven’t posted about any of the paper crafting going on around here lately so here are some handmade gift ideas for those fabulous teachers in our lives. In many towns parent groups like to have a teacher appreciation event at the beginning of the year, our area likes to have one in May.  These are actually really nice for any time of year you want to make handmade gifts.

We used some of these for the national PTA’s Teacher Appreciation Week/Day and for end of year gifts. Our school has activities for a whole week in May involving teacher appreciation; beginning with the children writing a special Thank You to any teacher they wish to compliment and ends with the PTA sponsored appreciation luncheon at the end of the week.
I think about all the other caring adults and volunteers we run into as a family and I know they put aside time each week to plan something special for the kids. From the preschool parent/child group organizers to the religious education volunteers at our church each one has a special place in our hearts.
I turn to making something handmade. Fortunately I have found out that we have many scrapbookers in our teacher mix. This is good news for me since I’m really only good at one thing. Paper. I also find it simple to put together something that is practical, that will be used and that is versatile to be used any which way they want.

A set of handcrafted note cards or hand stamped journaling cards are a recent example. I pulled from my  “stash” of scrapbooking and card making supplies and also from the growing stash of digital designs I have fallen in love with.

1. The hand stamped journal cards were inspired from an old blog post over at the fontwerks blog.
2. (no picture available, sorry) A handmade note card set using digital designs can be made with any digital brush kit. It is easy...I simply find a digital design that is pretty and using some type of photo or graphic design software on your computer you customize it according to paper size you are using and what size you want the finished product to be. I like using an 8.5x11 piece of heavy weight card stock, cut in half this will give you two note cards. Mix and match with envelopes and tie together with twine or ribbon.

3. Journaling cards were made from several designer digitals products, (the handwritten digital designs are from Ali Edwards).  Digital butterfly sticker also from designer digitals (though, no longer available). I also like to print out a background design and cut it to the size I need or use a paper punch (oval or circle scallop), then hand stamp an outline flourish or botanical design in the corners. Rubber stamps used are from hero arts or found online at impress rubber stamps. I am always attracted to either the botanicals or the flourishes. I always like to use a nice sturdy weight card stock for handstamping and digital projects. Can your printer handle some watercolor papers? If so, even better, that texture is beautiful. Mine can, but only the not too thick kind.
{This grouping also includes digital designs from Paper Relic (birds, butterflies with banners). Background paper from a digital kit of IOD (iron orchid design) designs from way back (2007 maybe.) Purchased at another fave site, scrapartist.com. They were some of the very first digital downloads I purchased and I still love them.}

There are so many to swoon over. And new ones added every week. Since you can print these out to use for your personal use (not commercial) and re-use again for cards/invites/gifts, plus re-size, and recolor, this is also a double bonus {or is that, triple? quad?}. Most are between 2.99 to 6.99 – I think that is affordable.


4. Let’s not leave out the “freebies” that could be practical additions to a paper project. Like making your own paper to fit your needs. I like to use these two freebie sites as a starting point for ideas such as making your own background patterns for a project. Here I like to use heavy weight card stock also.
Two favorites lately have been:
printablepaper.net (I discovered this one from a post over at the fontwerks blog) Cool school-lined paper.
And, a new to me,  free grid and graph paper site:
incompetech.com. I've loved graph paper ever since my high school days. This site has a circle grid graph generator that has nearly endless combinations of color and patterns. hmm, more swooning.


Posted by Picasa

11/12/08

discovered: finishing something makes me giddy

my craft table around 30 minutes ago


For the December Journal/Scrapbook (actually the official name is "December Daily") I chose to do a numbered tag for each day 1-25 but I didn't want to leave out days 26-31 since so much goes on that week with the kids off from school etc. I plan on just making a page/place to put those end of year reflections. I find the last week of the year always puts me in a kind of mood where I like to relax, enjoy the kids being home, clean up after the holidays and start fresh.

The whole idea was not to run out and have to buy a whole bunch of products....good thing I didn't have to. Plus, I like tinkering with digital to make my own journaling boxes or number tags. My two minor purchases were binder rings -- a box of 12 and 3" red vinyl number stickers in helvetica font. Office Depot has them on clearance this week. I was lacking in some christmas-y paper until I found my basic grey Figgy Pudding paper that I had purchased last year after the holidays. In fact, it was a little like Christmas as I uncovered a bunch of stuff I had stashed and forgotten about. Clear stamps I had forgotten about. Lots of number stickers I had yet to OPEN. gasp.

One thing, the best of all things I enjoyed, was finding out that I am totally in the mood for all this. Getting the supplies out for this project and the Christmas cards put me in a good creative flow that I haven't had in a while.

oooooh, look, pretty tags I forgot about (gotta love the toys, keeps little guy busy so I can glue things together)

yep, more stuff I forgot about. uncovered in an unlabeled brown box.
sheesh, why do I hoard?

Also tonight I printed off some penmanship paper to use as one of the pages for the journal. So I'll end the post with another very cool site to visit. Here. You can download and print out all types of papers or calendars for free. It gives a nice place to record thoughts, you can print them in smaller sizes for another element in your journal or use them as background paper on which to stamp an image on. When I print these I like to use heavy matte paper specially made for printing brochures and such (I use Epson)

2/20/08

Make : Your Own Sorta-Letterpress* Paper

Don't work on a project when you're tired +other experiments hacking my Sizzix

the rejected banner, not that the other one is perfect, neither turned
out the way I wanted it to look.

Tried something new out for the banner --you know it's true what research says -- working on something when you're sleepy doesn't produce good results. I finally had to close the file {I was nodding off so bad --} and call it a night at 1:30am -- Even after looking at it again I'm pretty sure I should just delete and start over. I'll try it when I'm not so sleepy.

Make : Your Own Sorta-Letterpress** Background Paper
What I wanted to show was the background paper -- -that is actually a "de-embossed" image. Or "de-bossed" ???-- I heard that phrase the other day. Either way its the the opposite side of the paper once you run it through the die cut machine while using an embossing folder. This is what I affectionately refer to as hacking my sizzix.

Tools used : original sizzix machine, cuttlebug embossing template {Damask}, ivory cardstock and pink inkpad.

The thinking one day was this -- wouldn't it be cool if I could do my own letterpress here at home without having to invest in one of those cool vintage letter presses or whatever they use to get those super awesome crisp designs. Why, if they could put silkscreening in a cute do-it-yourself-at-home kit like the Gocco {So much to Love about Japanese design!!!} couldn't someone come up with something like a desktop letterpress kit? hint, hint someone. Um, Hello, Japan, we need your design savvy here.

Enter the Sizzix {the original one} - it's essentially a press so I thought I could try this experiment out. I used cardstock from a scrapbooking project. The biggest paper size you can go to looks to be about 4x6 or greeting card size, or the size of the cutting pad, embossing folders come in all sizes. {sorry, I don't measure anything, sorta like I cook}

1. First I inked the raised design on the cuttlebug template with a pink ink pad. The ink will collect in the pressed down areas of the design. That's the cool part.

2. Working on your cutting pad, slide the paper in the embossing folder. You want the raised, inked design to be above the paper. Which means you put the embossing folder on the cutting pad the opposite way the real instructions tell you to.

3. When the paper is lined up where you want it, carefully close the folder on the cutting pad and slide the whole cutting pad {which has your paper+template on it} under the "press." Careful not to shift anything.

4. Press the whole design in place, the larger embossing folders require you to make several presses to get the whole design. Make sure not to shift the paper and folder, otherwise the design might not line up.


5. Remove cardstock from embossing folder and Admire your sorta-like-letterpress* paper! {Above} See how the ink gets inside the nooks and crannies?


{this one {above} was accidentally "pressed" twice so the texture is not as prominent -- but I wanted to show the right side of the template {named : Damask} it is one of the most elegant from cuttlebug.}


**sort of like letterpress, but not, close though.


Enjoy, try it out if you have a sizzix!

1/28/08

Back to artin' + craftin'

Okay enough of the electronic gaming and sci-fi interruptions, back to our regularly scheduled artin' and craftin'.

Here to update the blog a bit. I can always sense when I've been away too long...too many "posts" are flying around in my head. Too much stuff is already causing a clog so I don't need any extras finding their way in there.

First off, I noticed that I never blogged about any of my other cards from the holidays -- I had so much fun working with some new stamps from theangelcompany, figuring out that those cute, new cuttlebug embossing templates fit into my original sizzix machine quite nicely, using classic black and white photos, and an idea or two inspired from marthastewart.

My attempt at decorating the Clear glass ornaments with monograms using rub ons and stickers from american crafts and making memories turned out beautiful. That idea was originally from Ali's site during the month of December. I really thought they would be too fragile and that getting the rub ons to stay was going to be a task -- it wasn't, I made so many as gifts for friends and teachers.


tidbits of our christmas...new ornaments mixed with the old ones from my childhood...the pretty blue one I remember making with my mom (probably late 70s) Now my kids and I made our own...homemade tags for our gifts....my favorite spot to sit and look at the tree all lit up...favorite christmas gifts....and a forgotten bag of ornaments {probably bought at last season's after christmas sale} found in the basement had a little birdie just begging to be on the tree.


2/10/08 note : I found this post in "draft" mode and I had forgotten all about it.....it has taken about two weeks for us to get over all our sicky bugs and influenza. I haven't been that sick in years. Luckily all five of us had it at the same time. Whatever flu is going around -- I kid you not -- protect yourself. Its ICKY! you don't want it! :(

anyway -- more pics later...

11/29/07

Handmade Stamps


It has been a joy to watch my husband's latest project, for his graphic design class, Hand carved Stamps. This is the same guy who cringes when he sees me online at addicted to rubber stamps, the same one who sees the bag from one of my favorite local craft stores and says "oh, not again." So for his final he has to study a famous typographer, he chose Frederic Goudy, and copy one of the fonts onto a stamp which they craft themselves. "This was actually fun" he says later.

These photos show what he calls the "rejects" --- I was like
"WHAT?, People pay good money to have that distressed, grungy look on big honkin' letter stamps!" and I quickly stole them to add to my stash. I love how they look!!!! He's looking at me, thinking, exactly how much money have you spent? The kids are having a ball with the rubbery material {made by Speedball} although it is a bit messy while carving. And since they aren't allowed to use daddy's carving tools they are using various sharp pointed pencils to achieve their look. Yea, its been a little messy. Our daughter his making one that looks like a cow. Its still in the production and manufacturing stage :)

This week we are getting the Christmas tree up and preparing for little guy's 4th birthday, I just can't believe its that time again! {Sunday} so its time to return to decluttering the house for our December guests and activities. Once the house is clean for the small simple gathering it tends to stay that way much of December because of more guests or neighbors popping in. See, for me its a nice motivator to keeping it semi-tidy knowing that people might be over. {we go back to slacking in January, heehee} Christmas music will be on in the background to make it go faster :)

I do love this time of year so much, even for all the extra stuff we do "just because its Christmas" ..... for all the pretty-
glittering-Christmas-tree reasons as much as the getting together with family and friends reasons and always, always trying to keep the true meaning of Christmas tops around our house with just little touches of Santa and more about the spiritual side of why we have so much to celebrate this particular time of year. Keeps it real -- not material or fabricated. I wish there was one day {or all} without all the ads and marketing promoting the buy buy buy, shop shop shop mentality!

This December I would like us to do more together, just simple things, just the 5 of us, and start bringing some new traditions into our little {now complete} family. We'll keep visiting the large toy train display that starts every December {little guy's favorite} and I am on the lookout for what else to do in Rochester.


Posted by Picasa

11/16/07

christmas tree craft


Help, little foam trees are overtaking my table.....and naked quirky tree is growing on me. I think he looks good white. He will need to be white of some sort. Entirely too cute. Okay, after quirky tree I'm done. really.

Incidentally, walking through the mall the other day I noticed a lot of shop window displays using big cone shapes, all decorated a little differently. Lerner New York had sequins and the Gadzooks' tree was made with recycled magazine pages slightly rolled up at the ends. A grunge look. I'm thinking that could work with scrapbook paper or pretty wrapping paper.

night.

Almost done....

Posted by Picasa
Loved how the sequins overlapped nicely to fit the little tree shape.

Seriously, as I am doing these I start to think of all the different embellishments that could work on these cones.....reeeaaaally addicting.


buttons, buttons, and more buttons

At this point I was starting to worry that it wasn't looking too good {not looking like the picture}, but one by one as the buttons are added it starts to take shape :) Lots and lots of buttons! oh my! I went back to the website after this to check some details.


I tried trim from the sewing department -- but the ribbon it was attached to just wasn't happening with the little tree shape. So I detached all the sequins and began pinning them to the tree without the ribbon. This was too much fun.


This......turned to this {below}.........had to save the tiny beads for the top of the tree. I had various pins to use -- but ultimately, I liked the tree with the white pins instead of the mix of different color ones. Way too fun and the kids enjoyed it too. No pin injuries either.

Posted by Picasa

christmas decorating

I finally rotated some of the out of season decor items to make room for a more Christmas holiday look. I've never done the christmas stuff this early...partly to blame may be the cinnamon scented pine cones from the craft store. Since I have been smelling them all week I decided it was time to give them a proper home. Various sized glass jars are on top of our TV cabinet....each has its own color. Very neutral this season -- lots of browns and beige and whites.


These Styrofoam cone tree ideas are from 2peasinabucket

I first saw the cones on Ali's site, then after I realized I really needed a little more visual guidance I found the original post on the 2 peas website. The designer {tia bennett} has several ideas to work with. At the store I decided to get one tall cone and several small mini sized cones.


I stacked 3 of the small to get a "quirky" tree look. Haven't put any thing on that one yet. But I have a sizzix die that cuts tiny button shapes. That's one I bought last spring and haven't even used yet so I am going to try it.
Posted by Picasa

11/13/07

creative block + sewing smallish things

11/9/07 creative block + sewing smallish things

I didn't have time to post on the 9th, but I jotted this down...it goes along with the new craft books that have been making me so happy :)


The dreaded dry spell, the creative slump, the writer’s block. It’s been here. Sitting side-by-side with me. And, what an awful time. Right as I am supposed to be starting those Christmas cards. Right in the middle of trying to get all the projects in my head out of my head. Ahh, I thought the other day, therein lays the problem. Too much planning, not enough doing/creating.

Last time I was not feeling so craft-worthy I dove into other forms of artsy craftsy things like learning about printmaking, screen printing and painting on fabric. Then the block vanished as soon as I was making something again. So this time I turned to something besides card making and scrapbooking or painting.

This time the block led me to ---- Sewing and Needle Felting--- {felting supplies have just been added to the yarn-crafty sections at my AC Moore and JoAnns within the last month} Perfect timing I say.

Needle Felting is so cool - and in the process of finding out more about needle felting I discovered this whole new world {new to me anyway} of felting with wool fabrics. Several cool sites/blogs later and I am hooked -- man!! the amazing things you can do with it!! and it is just so beautiful to create with.

But although I grew up with a seamstress mom {I think one of the original crafty girls} who can make anything out of a piece of fabric, I really haven’t embraced sewing as a form of creativity throughout my life. In fact, I ran from it. Until now…I found some folks that could explain sewing with my attention span in mind. There are several fabulously written books on the whole “simple sewing” theme. Even magazines, I discovered. I’m feeling happy again to have made something. Even if sewing all those little stitches was a pain in the @$*#. It actually was very relaxing. I found that learning something new plus getting the hands working again {even if it was with a sharp needle that tends to draw blood} was just what I needed to help slump girl out of this slump.

Now the problem is, I want to hoard all the pretty fabrics I see. heehee.


Posted by Picasa

9/21/07

blog banner has new look

So I was going for a little something new -- something that would add the crafty side of me. Possibly the font combination took me a tad bit too long to come up with this afternoon {the downside of being a font-addict, is that I just have so many to choose from} but other than that I immediately was drawn to those photos from my stash. And gosh I am so long winded -- I was trying to say something about the blog contents. Blah blah, deep thoughts, blah. Finally satisfied, I saved and well there it is.

I added two of my favorite pics of homemade "crafty" gifts that we gave the kid's teachers this past June. They were fun to make -- mental note made today after finding the photos that I want to make more.

We gave them a theme {the teacher was a fan of turtles} and so I labeled the set of glass marble magnets the "swimmy sea turtles" set. I found a nice quote and typed it on card stock then cut it out to include as a tag on the pouch. I set them up in a little shimmery pouch bag {sold at acmoore for like .69 cents} and labeled a mini jewelry box with the name. She was like "wow, you guys made these?" Well I hope she did like them, I think she did. Useful, I hoped. Then a card I really enjoyed making; it turned out so pretty because of the paper flower. I got the idea about the magnets from the not martha site {real good creative site}


I just love how this flower turned out! This is easy and made of varied round paper shapes cut into with scissors with a brad in the middle -- but any cute thing could be in the middle really -- button, fabric flower, felt shape.


8/23/07

A Funny Thing Happened

On the Way to Blogger tonight.....

But first: There are several things I promised myself I absolutely needed to get done before the kids head back to school so I've not been in the blogging or crafting mood -- but oh so many thoughts running through my head. Still having fun keeping up with the"daily something" challenge from Ali's blog. As long as I keep it simple and it's fun, I do it. When it becomes frightful to open a glue stick -- well then I know its time to move to something else.

So with all I have floating around in my head I thought the word for my life this week {frankly, every week} would have to be Balance. And as I went over to check on the challenge over at OLW I saw that they had picked that very same word for the journaling/scrapbook challenge. Cool.

So here's the, a funny thing happened on the way to blogger, part: a visit to Etsy and the OLW blog were my first stops tonight. I got distracted, as I usually do, and I found this woman's blog. It was nice to see that I wasn't alone in some of my thinking. Thru her blog I landed on one called "delightful blogs" and then another, and another, you know how the story goes. Eventually getting back here to change some stuff around in my own blog. When I realized that I had never done a search on blogger for blogs with similar interests {duh} I just usually find them on my own. So it dawns on me to click on the "Rochester" tag and up come some 995 {or more} bloggers from Rochester. Okay -- I admit to reading the first 3 or 4 pages before I finally saw one that interested me -- so first it was her, then her. And here's the funny thing --- the thing I had been hoping for since last year, No, anxiously waiting for, was there blogging right before my eyes. Had I gone to look for it on purpose I wouldn't have found it - but through a collection of smart, artful blogs there it was. I love that little connection that is felt as soon I begin reading another's blog......

Anyway...

Finally Rochester will have its very own version of the craft revolution -- craftivism --- read all about it here on their site if you are interested. "Second Storie} indie market" will have its very first show in September. I for one am thrilled to have this finally hit Rochester. And I know there are lots of others feeling like this out there too. Very exciting! Not that we don't have our share of wonderful craft fairs all summer and into the fall, but this one will be an extremely cool addition.

Doing the happy dance!

The other funny thing was that on another occasion, months ago, while I was looping through Etsy I discovered one of their vendors that will be featured and just fell in love with her letter pressed invitations and the designs on her postcards. Can we say swoon?

Full circle. How's about that. Start in Rochester, bebop all over the blog-filled internet only to end up back to a Rochester connection. That's cool. As a side note, this is all very "ahhh, moment" for me {I heart Etsy} because I someday hope to actually open a shop on Etsy.

8/11/07

Summer Post


Summer's going by, and definitely we are trying to enjoy every last bit, slowly. Mostly poolside, reading, reading with the kids, or last weekend, the zoo. So blogging has taken a back seat for -- about a month. {hmmm, didn't seem like a month?} Garden is doing great this year. My own fresh salad. That is a joy! I love the color of this lily in my backyard.

In the meantime, I finally learned how to make a banner for the site.To this site for tutorials, I love that site because the ladies are the best at answering any questions. Lucky for me, the new blogger makes it a very, very easy, painless, satisfying experience. And I didn't need to haul out the programming for dummies book. I did doodle the little birdie (on already used paper, of course) then scanned it in. I can't believe I lived without a scanner for so long.

I also love her, and her and have tried some of their craft ideas. Cuz, well when you have as much patterned paper as me you better start using it :)

Also still always taking alot {and I mean, alot} of pictures. [yes, we are a kodak family] I know I can do more with them. I always have a bunch of sites or other creative blogs I visit when I am feeling the lack of a creative spark, this week I popped into some of my all time favorites. Yesterday at this s
ite I felt the spark for a summer mini album. I have this small album I picked up on clearance for really, really cheap. The kind of cheap you can't pass up. But then I hoard, I start stashing stuff, or maybe its the "gathering" that ali also describes on her site. In a kind of "I know I can do something with this later" trance I buy it. Then there's the "but I want to try something different, something else I've been afraid of trying" logic and I begin the hoarding and stashing again -- Lately this logic has helped me build my library of books about mixed media, collage, and screen printing and print making techniques. So I've been doing alot of reading about the different techniques. The collage and screen printing are making me swoon right now but I actually bought some of the beginner tools for printmaking, like making my own rubber stamps for instance, the carving is very relaxing, therapeutic for me, um, but the instant gratification of finishing something isn't always there. More time. Please, more time for mommy's stuff. {what mom doesn't wish for that one!} I can do this, I think, with more time.

Taking note on how it all applies to my life right now. How I have evolved as a person, mom, wife, and the bigger question of "what do I want to do with the rest of my life?" And so all of this is part of a bigger goal of mine -- because I have loved art all my life, loved drawing, doodling, all of it. Like the feel of paint on fingers, all of it messy, even the smell of not so nice smelling solvents [ okay, maybe shouldn't admit that one] The thrill of seeing something you made thrill someone else. I don't think they can bottle that one yet.
Why didn't I do anything with this love of the art before? I guess I could write a whole lot about leaving the "career" and being a stay a home mom and the worry that sets in when you realize that a) no way can I go back to doing what I was doing and b) seven years is a very long time to be out of the "real" world of work. I get the jitters just thinking about it. Well that would make this a very long post. And really its not about dredging up what you could've done better/different it's about the "okay, well, your here now, and you can move forward from here." I remind myself that everything has a reason for happening. Everything has helped [not hurt] you get here, hasn't it? So it can't be all that bad.

So anyway, there's the "daily something" from ali's site that sounds like alot of fun [and I can accomplish] and then getting back to the "one little word" challenges. And there are others, when I can find time between all the stashing and the hoarding.


5/2/07

"offical PTA stuff"

...luncheon raffle ticket-holders for our children's school --- they told me low budget -- but I still think they needed to look fun!
...just a little more tweaking...decided to go with a school theme -- cause I found this cool graph paper.
...used digital paper & doodles from designerdigitals.com and talented digital designer angie briggs. Made round stamp from shapes in my software.
....Alamain and SA Inkspot fonts
Posted by Picasa

working on this......

Posted by Picasa

8/11/06

Handwriting Fonts


Creating....loving it and making such a beautiful mess with all the pretty paper and tools.


and..your own handwriting and doodles can be fun...see....I encourage scrapper friends to use their own handwriting - it makes it so unique. But, I still collect all the free fonts I can get my hands on. Creating Keepsakes just offered two free fonts from two of their designers {you have to go to the website and message board} and they are beautiful! They're handwriting fonts!

7/7/06

Feelin' Crafty


Some of the crafts we've been working on {below}....some were for teacher gifts, others for our yard sale, some are just funny/cute pictures. It was my first attempt at embossing with a heat gun. Its one of my new loves now. The note cards I did were for the teachers and each had a cute bug embossed in gold embossing powder. I love it when I get all the supplies out. I make such a mess -- but it all looks so beautiful to me. All that paper, ribbons, glittery stuff all over the place. Tools, brads, scraps of pretty paper.

Can't believe the kids have been out of school for two weeks already.

July and August are some of my favorite times....slower schedules, longer days, easy clothing {or less of it} more time for scrapbooking....you'd think.

So many photos....so little time.

This one of my little guy with the hat gets tagged as one of my favorites for sure. Going to go look up some of my digital kits that I have stashed {more like hoarded} in my hard drive and see what I can come up with.


I loved the idea of tags for our little oregano flower pots, one night while on a few paper/stationery websites I fell in love with an idea at "lovelymailorder" www.lovelydesign.com they have these block-style tags right on the website that actually look like shipping labels on their products. I liked how they look ultra cool/mod and sort of industrial so I went back to my software and tried a version of it that would fit the tiny pots. And there they are. The smaller tags are mine - they just say "fresh oregano" and the back says "from the garden" I layerd various circle shapes in the software, printed and cut the tags to a small size for the bags we put the pots in.

Watercolor thank you

Still enjoying the watercolor for card makers class. Since I wasn't able to follow along each day I'm still busy practicing some of...